How to Use the Cute Taco Mascot Vector Pack 04 Like a Seasoned Designer
What Makes This Vector Pack a Solid Starting Point
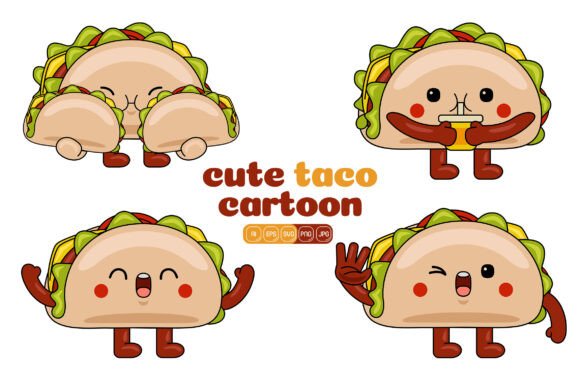
The Cute Taco Mascot Vector Pack 04 gives you 100 separate vector illustrations built in a clean flat design style. Each element is entirely vector-based, so you can resize it to a massive billboard or a tiny app icon without losing a single crisp edge. You receive the master Ai file for Adobe Illustrator, along with EPS, SVG, and PDF versions for cross-software compatibility. For raster needs, you get a high-resolution JPG and a PNG file with a transparent background, both at 3000 x 3000 pixels. That breadth of formats — and the promise that you can change colors on every shape, combine different elements, and build your own illustrations — is what draws in beginners, small business owners, social media managers, and freelance designers alike.
People reach for a pack like this when they need a friendly character to anchor an infographic, brighten a landing page, or give a printed menu some personality. Because it arrives as fully editable vector art, you are not stuck with one static image. You can pull apart a taco character, grab just the hat or the eyes, and remix it with other mascots from the same set. That freedom, however, also creates a handful of quiet traps. Many well-meaning creators download the pack, open one file, and apply it exactly as it appears, missing the very flexibility they paid for. Understanding a few practical guidelines can turn a generic-looking design into something that feels custom-made for your brand.
The Reality Behind "Unlimited Variations"
A pack that says you can create countless variations often leads to a false sense of ease. The Cute Taco Mascot Vector Pack 04 is indeed exceptionally editable, but that does not mean every alteration will benefit your project. The mistake here is treating the default colors, default face combinations, and default mascot poses as a finished identity. You might end up using the same taco mascot that a dozen other food bloggers or taco shop owners are using, without a single adjustment. Your social media banner then blends into a sea of similar-looking assets.
When your audience sees something they recognize from another brand, even subconsciously, your message loses distinction. That sameness can reduce trust, especially in food and hospitality businesses where personality matters. The better approach is to immediately change at least three things: shift the main taco shell color to match your brand palette, alter the size relationship between the mascot’s facial features, and swap out an accessory. Even a small change like adjusting the mascot’s hat or adding a simple background shape you build from one of the 100 included vector elements signals to viewers that you put thought into the design. Plan these edits before you begin, so you are not just clicking and hoping.
File Format Pitfalls That Hurt Print and Screen Quality
Receiving six different file formats is a huge advantage, but only if you choose the correct one for each task. A recurring error is using the high-resolution JPG for everything, including items that require a transparent background. The JPG format does not support transparency, so you will have an unwanted white box around your cute taco mascot when you overlay it on a colored website background or a printed flyer.
Another costly slip happens when designers scale a raster JPG or PNG far beyond its 3000-pixel dimensions. While 3000 pixels is generous, stretching it to cover a large-format banner or a trade show backdrop can introduce softness and blur. The vector files — Ai, EPS, or SVG — can be resized infinitely without quality loss. Reserve the high-res PNG with transparency for digital layouts where you need a ready-to-place asset and the size does not exceed the original dimensions. Use the editable vector file for printing, large signage, and any situation where you anticipate multiple revisions. Learning to export from the vector source at the exact dimensions needed, rather than relying on one pre-rendered raster, keeps edges razor-sharp and colors accurate.
Color Editing Gone Wrong
The pack’s flat design style simplifies color changes enormously, yet it is easy to fall into two traps: inconsistent color application and poor contrast. A common scenario: someone selects a new taco shell hue that looks vibrant on screen but turns muddy when printed in CMYK. If you intend to use the Cute Taco Mascot Vector Pack 04 on both digital screens and printed t-shirts or menus, always set your Illustrator document color mode to CMYK early on and test small swatches. Digital-only projects can stay in RGB for brighter on-screen pop.
Contrast is another area where mistakes creep in. A mascot’s facial features — eyes, mouth, little tongue — need to stand out against the taco shell and any added background shapes. If you make the shell a soft pastel and then use a similarly toned pastel for the eyes, the expression disappears at smaller sizes. Before finalizing your edit, zoom out to 25% or preview the mascot at the size it will appear on a smartphone screen. If the face becomes an indistinct blob, rework the color values until the key details remain readable.
Combining Elements Without Losing Cohesion
The ability to mix and match from 100 vector illustrations is what elevates this pack above a simple clipart set. However, randomly grabbing parts from different mascots can produce a disjointed character. If you take the legs from one illustration, the face from another, and a sombrero from a third, you might end up with proportions that look unintentional — a small head on a large body, or arms that appear to float.
A practical fix is to maintain a consistent scale reference. When you pull elements together, group them and use the original full-body mascot as a guide for size. Align extremities to the same baseline. Another tip: carry at least one visual thread across everything you combine, such as a matching outline thickness or a recurring color accent. This small discipline transforms a patchwork into a cohesive illustration that still feels like it belongs to the same family. Keep a second window open with your in-progress version and a reference version of the original mascot, and toggle between them to check balance.
Resizing Shortcuts That Sabotage Your Work
Resizing in a vector program like Adobe Illustrator is normally safe, but attaching raster effects — a drop shadow or a soft glow, for instance — locks you into specific pixel dimensions. Some users add these effects without realizing they are no longer purely vector. If you then scale that file up, the shadow turns jagged. When you need to add subtle effects, keep the base mascot fully vector, duplicate the artwork, apply the effect to a separate layer, and note the resolution at which it was created. Better yet, handle soft effects in a final layout program where you know the final output size. This keeps your master vector file clean and infinitely scalable.
Another common resizing issue involves strokes. If you scale a mascot down, strokes that looked perfect at full size can become too thin and disappear. Always check the "Scale Strokes & Effects" option in Illustrator’s preferences before transforming, or manually adjust stroke weights after scaling. For digital thumbnails, like a website favicon derived from the mascot’s face, reconstruct a simplified version where facial features are bolder. The original intricate details will vanish at 32x32 pixels.
Real-World Applications and Thoughtful Customization
Consider a food truck owner who downloads the Cute Taco Mascot Vector Pack 04 and uses the same smiling taco character on a printed banner, an Instagram post, and a loyalty card. If the mascot is unchanged, the design lacks connection to the specific truck’s name, color scheme, or unique salsa recipe. A smarter path: edit the taco shell to match the truck’s signature sauce color, add a tiny version of the truck’s logo on the mascot’s hat, and use a custom background element from the pack to frame the mascot. This small effort loops the visual identity together and makes a customer more likely to remember the brand.
For a social media manager crafting a taco-themed infographic, using a different mascot pose from the 100 options for each data point adds continuity. Avoid placing a highly detailed mascot directly next to a minimalist icon; the style clash can feel amateurish. Instead, extract simple shapes from the vector pack — a lime slice, a pepper, a small salsa splash — and use those as supporting graphics. This maintains the flat design consistency. When exporting for social media, start from the vector file and generate the exact canvas size required. A PNG file with transparent background is perfect for a animated Instagram Story element, but for a static post, a flattened JPG with the intended background already composed might be the safer deliverable.
Getting Real Value from the 3000 x 3000 Pixel Assets
The raster files shipped in this pack are set at a generous 3000 pixels square, which is excellent for print-ready items like posters or high-dpi digital displays. Yet many people use them as-is on a website, which can slow page load times considerably. A common corrective step is to resize the PNG or JPG to the actual display size before uploading. If your website hero image area is 1200 pixels wide, export or resize your custom illustration to that width. This simple action shaves valuable kilobytes off your page weight without any visible quality drop. For those who need a transparent overlay on a product mockup, the PNG format’s transparency is indispensable — just remember to keep the original file untouched, so you can return to it for different export sizes later.
Lessons That Stick
People using the Cute Taco Mascot Vector Pack 04 correctly will spend a few extra minutes with the Ai file before bouncing out to a final format. They will build a small style guide for their mascot usage: which colors are the brand colors, which accessories belong, and what minimum size the mascot should appear. They will not rely on default expressions for every touchpoint; instead, they will open the EPS or SVG in their chosen software and make those intended changes.
When a team shares the mascot across different projects, the editable vector source avoids the “I only have a tiny JPG” panic. Hand off the original file with a note about the correct color hex codes. This simple workflow prevents the dreaded low-resolution printed menu where the cute taco looks like a pixelated puzzle. The promise of the pack — easy to edit, customize, and combine — only holds true when you take ownership of the customization step rather than assuming ready-made means no work needed.
From Purchase to a Polished Project
A pack like this deserves a thoughtful approach. Start by browsing every one of the 100 illustrations inside the AI and PDF preview. Identify ten that speak to your project’s tone, whether playful, spicy, or calm. Then open the editable Ai file and test color swaps on those ten before committing. Build a small library of your custom variants, saved as separate artboards, so you can drop them into social media posts, printing material, website headers, and landing page banners without constantly re-editing. The flat design style rewards bold, clean color choices, so avoid muddy gradients unless you test them carefully.
The Cute Taco Mascot Vector Pack 04 offers high resolution, numerous file types, and full editability — all the ingredients for memorable visuals. The difference between a happy customer remarking “this saved me hours” and a frustrated one complaining about pixelated results comes down to a handful of careful decisions made early on. Work in the right color mode for your output, scale vectors for large sizes and appropriately sized rasters for web, and always personalize the mascot until it feels like yours. Happy designing, truly, starts with respecting the flexibility you already hold in your hands.